Catch the Celestial Dance: Your Ultimate Guide to Finding and Photografing Auroras!
2024-11-13
Author: Olivia
Under specific conditions, energetic particles from the Sun interact with Earth's magnetic field, resulting in a mesmerizing natural phenomenon known as auroras. As these magnetic field lines snap and release particles toward the Earth's poles, they collide with atoms in the atmosphere, creating an awe-inspiring light display. This captivating spectacle occurs more intensely during periods of high solar activity, particularly during the solar maximum of the Sun's 11-year cycle.
The colors of the auroras are a result of different atoms and molecules glowing when struck by these energetic particles. Oxygen atoms, for example, emit red or green light depending on their energy levels, while nitrogen molecules give off blue and pink hues. The abundance of oxygen at higher altitudes explains why red auroras are often observed at lower latitudes. As we observe these ethereal displays, we witness nature's incredible artistry shaped by the very elements in the atmosphere.
While auroras are always technically present, their visibility spikes during solar maximum. Fortunately, scientists can sometimes predict when auroras might be visible a day or two in advance. By monitoring solar activity and utilizing satellites to assess particle storms approaching Earth, they can provide accurate forecasts. The National Oceanic and Atmospheric Administration’s Space Weather Prediction Center offers an aurora dashboard that is invaluable for tracking these celestial events.
Understanding the Kp index, which measures geomagnetic activity on a scale from 0 to 9, can also enhance your chances of witnessing auroras. Higher Kp values suggest wider visibility and the ability to see auroras in regions farther south. In the continental United States, states like North Dakota or Minnesota often report sightings when the Kp index is as low as 4.
Before venturing out to photograph auroras, check weather forecasts to ensure clear skies and select a safe, dark location away from city lights — the darker the area, the better the view! If you're based in mid-latitude northern regions, position yourself with a clear sightline to the north where auroras typically appear near the horizon.
When you get to your location, patience is key. Aurora hunting can be unpredictable. Displays might last all night or fluctuate in brightness, often peaking around midnight but occasionally visible from sunset to sunrise.
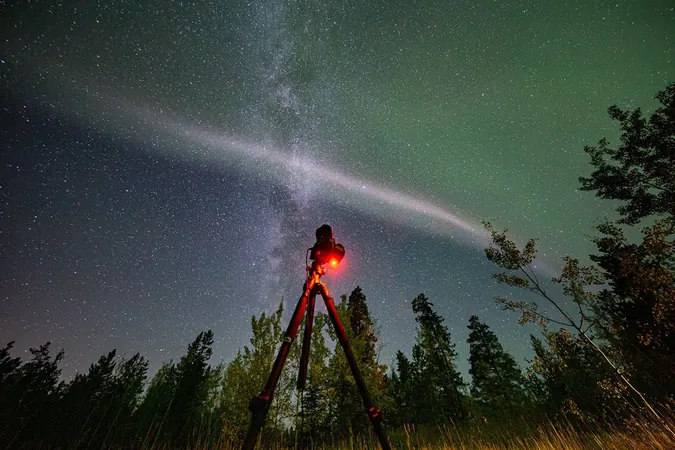
For photography enthusiasts, a camera with adjustable settings is essential. Going with a manual mode will give you the most control; set your focus to near infinity and try out different settings to see what captures the auroras best. Experts recommend a wide-angle lens with a large aperture (around f/2.8) to grab more light quickly, alongside an ISO set between 800 and 1600 with exposure times around 5 to 10 seconds.
If you find it challenging to capture the magic, don’t worry! Even smartphones have came a long way in taking stunning photos of auroras. Many newer models boast “night mode” capabilities designed for low-light conditions. If your phone lacks such features, look for third-party apps that offer manual camera settings to adjust exposure, ISO, and white balance.
If you're interested in contributing to science, consider participating in citizen science projects like NASA and NSF’s Aurorasaurus. By sharing your images with precise timestamps and location data, you can assist scientists in studying auroras and even contribute to groundbreaking discoveries like the recent identification of STEVE (Strong Thermal Emission Velocity Enhancement).
With your newfound knowledge and a little luck, you'll soon be ready to witness one of nature's most breathtaking displays. So grab your camera, seek those dark skies, and embark on your aurora-chasing adventure — the sky is waiting for you to capture its stunning light show!


 Brasil (PT)
 Canada (EN)
 Chile (ES)
 España (ES)
 France (FR)
 Hong Kong (EN)
 Italia (IT)
 日本 (JA)
 Magyarország (HU)
 Norge (NO)
 Polska (PL)
 Schweiz (DE)
 Singapore (EN)
 Sverige (SV)
 Suomi (FI)
 Türkiye (TR)