Unleashing the Power of Raspberry Pi: Building an FPGA Test System
2025-08-02
Author: Wei Ling
Introduction to a Revolutionary Project
In our recent ventures, we've crafted an innovative embedded system featuring a Spartan 7 FPGA. Now, we're taking the leap into the world of prototype development with an exciting new carrier card, designed to interface seamlessly with our embedded tile.
This carrier card is not just a supplementary component; it's a game-changer, allowing external control and stimulation of the embedded system while also supplying essential power and clock signals. Our goal? To make it a standalone powerhouse, capable of automating tests and running demanding applications effortlessly.
Why the Raspberry Pi Compute Module 5?
Enter the Raspberry Pi Compute Module 5 (CM5) — a robust System-on-Module (SoM) that merges the incredible capabilities of the Raspberry Pi 5 with the requirements of industrial and embedded applications.
Key Features That Impress
- **Processor Power**: At its heart lies the Broadcom BCM2712, a quad-core 64-bit Arm Cortex-A76 SoC clocked at a blistering 2.4GHz, mirroring the power of the Raspberry Pi 5.
- **Memory Marvels**: With options of 2GB, 4GB, and 8GB LPDDR4X SDRAM, expanded versions are on the horizon for 2025, promising enhanced reliability with ECC support.
- **Storage Solutions**: Choose from 16GB, 32GB or 64GB of onboard eMMC flash storage, with an exciting Lite version allowing for external memory via SD or NVMe.
- **Graphics Victory**: The 800 MHz VideoCore VII GPU supports OpenGL ES 3.1 and Vulkan 1.2, bringing impressive multimedia capabilities.
- **Top-notch Connectivity**: From integrated Wi-Fi and Bluetooth to a robust Gigabit Ethernet PHY, the CM5 ensures seamless communication. Two HDMI ports enable dual 4K display output, while PCIe and multiple USB ports elevate its capability.
Architectural Wonders
Our design emphasizes a meticulous architecture to optimize the embedded system tile's performance. Key features include:
- Direct JTAG access and USB JTAG via USB-C.
- Configurable clock generation and extensive GPIO options for peripheral connectivity.
This thoughtful architecture propels the functionality and versatility of our carrier card to new heights.
Bringing the CM5 to Life
For our team's debut with the Raspberry Pi CM5, we relied on the USB-C interface for setup. Proper hardware design ensures quick access to configure the module without any booting hiccups.
By using the Raspberry Pi USB Boot Setup alongside the Raspberry Pi imager, we transformed our CM5 into a functional drive, setting the stage for a smooth installation.
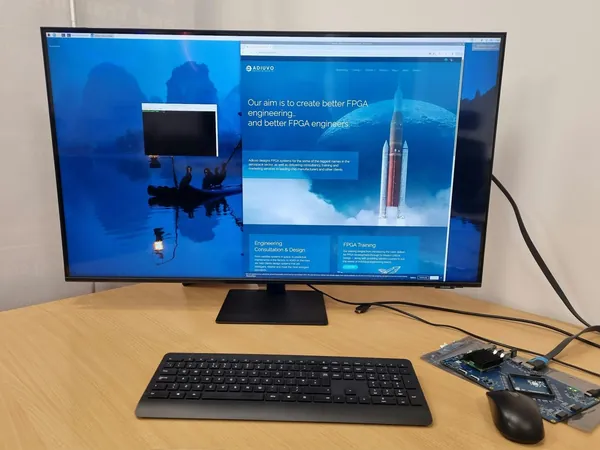
Testing the Waters: Checking Connectivity
After installing the operating system, it was time to power up the carrier card. Booting into Raspbian revealed a vibrant desktop through our HDMI connections, confirming that everything was functioning as intended.
Equipped with USB ports for peripherals and the potential for remote access, this setup not only supports development but paves the way for extensive FPGA testing.
Looking Ahead: The Future of FPGA Testing
While we’ve made incredible strides with our carrier card, the journey isn't over yet. Enhancing the FPGA functionality remains a priority, and we'll continue to document our progress in upcoming projects.
Stay tuned as we delve deeper into configuring and testing the FPGA tile—our adventure with the Raspberry Pi Compute Module 5 is just beginning!


 Brasil (PT)
 Canada (EN)
 Chile (ES)
 Česko (CS)
 대한민국 (KO)
 España (ES)
 France (FR)
 Hong Kong (EN)
 Italia (IT)
 日本 (JA)
 Magyarország (HU)
 Norge (NO)
 Polska (PL)
 Schweiz (DE)
 Singapore (EN)
 Sverige (SV)
 Suomi (FI)
 Türkiye (TR)
 الإمارات العربية المتحدة (AR)