My Explosive 3D Printing Journey: Mistakes, Discoveries, and Upgrades!
2025-05-28
Author: Chun
Diving Deeper into 3D Printing
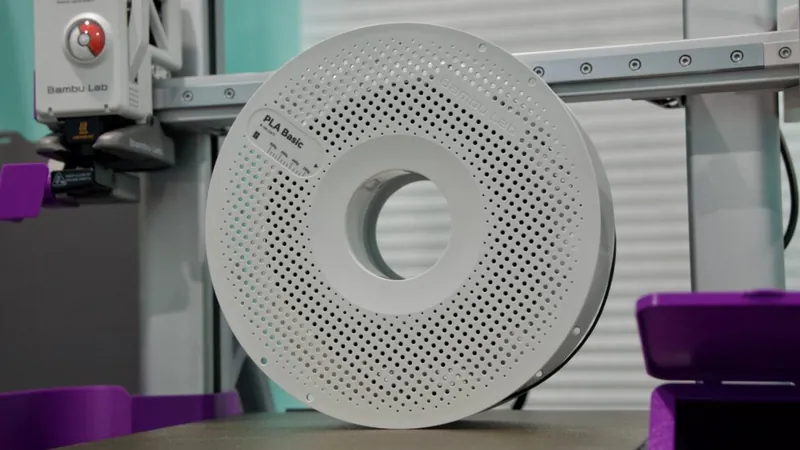
In my latest escapade with the Bambu Labs A1 3D printer, I've unearthed a treasure trove of insights about plastic and my 3D printing abilities. This bustling machine on my desk is no mere gadget; it’s a gateway to transforming digital designs into tangible creations!
In the first chapter of this journey, I reveled in the enchanting process of printing basics and grasping essential settings in the Bambu Studio app. Little did I know, my adventure was just beginning as I embarked on a thrilling mission to create upgrade parts for the A1—using the A1 itself!
A Rollercoaster of Learning: Mistakes and Marvels
As I dove into my first major project, I faced my fair share of blunders. But these stumbles became invaluable lessons. By putting my printer to the test, I discovered the fascinating world of different filaments and their properties, including which ones the A1 could handle effectively.
Crafting Functional Upgrades: My First Projects
My initial projects included a handy designer for my office's ceiling fan remote and a wall-mounted holder for my gaming gear. Both were quick wins that boosted my confidence and showcased the printer's precision.
The first hiccup I encountered was during the printer's purging process—a routine that dispels a bit of filament to clear the nozzle. While necessary, it was quite a messy spectacle on my desk! To solve this problem, I designed a 3D-printed purging bucket, which is a wildly popular solution among A1 users.
With success under my belt, I turned to YouTube to explore community creations and strategies. I ended up printing several key components, including:
Top Mount for AMS Lite and More
1. **Bambu Lab AMS Lite Top Mount and Z-Axis Stiffener**: This essential accessory helps maximize vertical space and stability. After installing, a recalibration was necessary to accommodate the new balance.
2. **A1 Purge Waste Bin and Deflector**: A simple yet effective design that fits perfectly with the printer's layout.
3. **A1 Adjustable Camera Holder**: A bit more complex, this upgrade required some daring modifications, yet it elevated my print monitoring significantly.
4. **A1 X-Axis Cover**: A handy print that protects the exposed rail when my printer is idle.
Advanced Printing Challenges and Learning Curves
As my projects progressed, I faced common rookie pitfalls. For instance, I quickly learned that ABS plastic is tricky on open-bed printers. My initial attempts at printing with it were chaotic, leading to disastrous results. Switching to PLA was a game-changer, but even then, I encountered challenges with prints being squishy or ineffective.
Eventually, I discovered that for sturdier prints, PETG is the champion, especially for outdoor applications. However, my early experiments with it taught me to tweak settings for better results.
Mastering the Diverse World of Plastics
Filament options abound, and each type offers unique characteristics. Here’s a brief breakdown of the most common:
- **PLA**: Widely loved for its ease of use and eco-friendliness but flops in heat resistance.
- **PETG**: Combines strength with flexibility, making it ideal for functional parts.
- **ABS**: Durable and heat-resistant but comes with challenges, particularly with fumes and open printing.
What’s Next on This Wild Ride?
So many exciting projects await! With the knowledge I’ve gained, it’s time to tackle more ambitious creations, be it practical items around the house or fun decorations. This journey through 3D printing has taught me that the real joy lies in experimentation and continuous learning.
Stay tuned for future posts where I’ll reveal more of my favorite prints and upgrades, sharing insights that might just inspire you to dive into the world of 3D printing yourself!


 Brasil (PT)
 Canada (EN)
 Chile (ES)
 Česko (CS)
 대한민국 (KO)
 España (ES)
 France (FR)
 Hong Kong (EN)
 Italia (IT)
 日本 (JA)
 Magyarország (HU)
 Norge (NO)
 Polska (PL)
 Schweiz (DE)
 Singapore (EN)
 Sverige (SV)
 Suomi (FI)
 Türkiye (TR)
 الإمارات العربية المتحدة (AR)